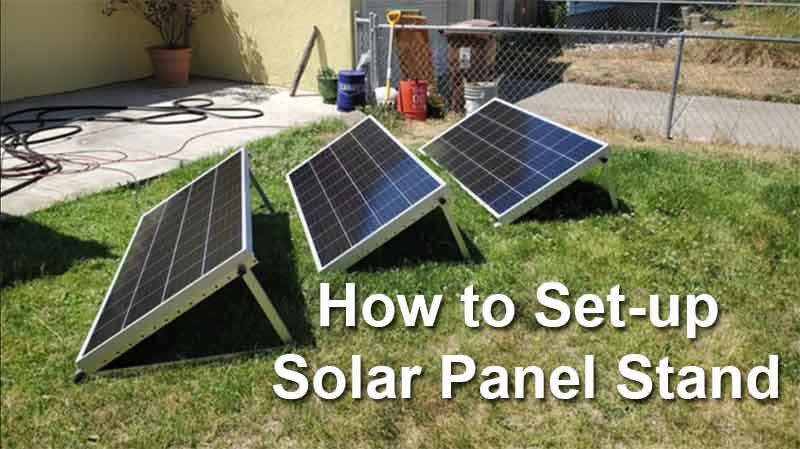
How to Set-up Solar Panel Stand – We’re going to do a step-by-step guide on setting up the solar panel stand legs here. So, let’s just jump right into it, and show you how it’s done. There are going to be two identical pieces to go on either side of your solar panel. You can see there are holes throughout it, so it’s easy to mount onto the solar panel, and onto the roof of the structure where you try to put your solar panels, and you’re able to change the actual angle of your solar panels, super useful!
Table of Contents
How to Set-up Solar Panel Stand
So, depending on where you are in the country, and what time of the year, you’ll be able to get the optimal angle facing towards the sun. These are all the parts and pieces that you’re going to get.
 |  |
 |  |
The frame, these are the parts that we use to make the frame and mount it to the solar panels. These are the parts that we’ll use to screw the mounts into the structure. So, into the roof of, an RV, or a shed, something like this. And here are some extra parts and pieces.
The way to line this up to effectively put them together is to have both of the long pieces sitting. You’ll have the small openings facing down, and then on the one on the back, you’ll have the large openings facing down. This way you’re able to turn the first piece slot it together. We’ll have two of the holes at the very front-facing one another, and we’re able to put one of these pieces through and lock it in.
Now, that we have the one piece in at the end. We’re able to open/close and change the angle of how our solar panel’s stand legs are going to be. This is where the final piece comes in. Now, we open it up and we’ll put this to a height that we want this is where you’ll take your little pieces, put them through another one of the washers once you tighten these down.
 |  |
Now, this is completely finished and we’re able to mount it onto the back of a solar panel. So, the way to think about this is that this bottom portion will be mounted to the roof of the structure, that you’re going to be putting your panel array on. So, we’ll think about it like this. We’d be using these large screws to go into the roof of the structure, and then this side here is what we use to tilt the actual panel on.
So, if that’s the case, then we need this side to be attached to the panel. We’re going to use the holes that are on the actual aluminum frame to come with all the panels to go in and connect to your panel stand leg. So, I’ve gone ahead and done one already. I’ll put it back up in line right. Now, I’m going to use one of the smaller screws that also have the washer, and the locking nut you’ll put it through then we’ll put the washer on, then we’ll put the locking nut.


All right, so, that’s how you put together these solar panels‘ stand legs. You’ll notice here that this is a 100 watts panel, and there’s a little bit that sticks up over the actual top of the panel itself, that’s because these panels stand legs work for 200 watts panels as well. Also to note that you don’t actually need to mount the panels themselves the stand legs into a surface, most customers actually just use them in their backyard, just kind of sitting up like this. You don’t need to permanently install them although.
Video: https://www.youtube.com/watch?v=lLLWBpevyD8
Other Articles Review
- Hybrid System Design And Calculation
- Bluetti AC200P 2000wh Power
- BLUETTI EP500 Pro Home Backup Power
- Off-Grid Solar Power System
- On-Grid System Design and Calculations
Promo


![Lion Safari ME [Base Camp Kit] 2](https://i0.wp.com/portablepowerusa.com/wp-content/uploads/2021/03/Lion-Safari-ME-Base-Camp-Kit-2970wH-Solar-Generator.png?resize=300%2C300&ssl=1)


